TWISTED
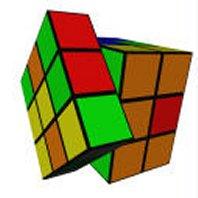
I was still living in California and in 6th grade when the Rubix Cube craze first hit. Seemed everyone had one and we'd sit around at lunch and between classes twisting those cubes trying to match and restore them to their original, perfectly aligned colors. Sure, it was a fad, but they were fun. At least for awhile. Then they got annoying. Fun times gave way to frustration as we all wondered how hard could it possibly be to line up whites with whites and blues with blues and thought wait I just had it, and damn this thing sucks! Well I shouldn't say all of us. I'll never forget there was this one kid, Robert, who could solve them with the ease of tying his shoelaces. It was insane. You could hand him your cube and after a few fast flips and twists, he'd have it completely aligned like new. It was impressive and a little freaky.
So when I saw a basket of Rubix Cube keychains for .25 cents at a local fair recently, I couldn't resist and got myself one. It's perfectly aligned. I've thought about starting it a few times now, but I just haven't been able to bring myself to do it. I'll probably wind up frustrated, and there'll be no freaky Robert to restore it. Damn this thing sucks!
posted by Sar at 7:25 PM
![]()
![]()


13 Comments:
Sar, don't worry... There are plenty of easy-to-use solution websites on the Internet. I used one to fix my cube a few months ago.
Hey! I was named Robert in grade school!
Nah, just kidding.
Those things still make me anxious. I never solved one. Ever. Ever.
Araider - "Peeling the stickers was (____ fill in the blank) though." Fun? Cathardic?
TLM - Easy-to-use solution websites? Really, you give me too much credit.
Poobah - You big tease.
Doug - In your case, that's only because it involves colors not words.
I used to take mine apart and put them back together in the right pattern.
Chris - Cheater! Actually, I can so see you doing that.
Araider - So you were the type to peel the stickers off and put them back in their right order. Another cheater!
here yo go sar...
easy instructions to solving it when you dcide to attempt it...
Rubik's Cube Cheat Sheet (Solution #1)
Solution #1
Step 0 -- Notation
Before we get started, we must work out a method for describing the various moves that will be made. There are six faces, with the following notations:
Upper, or top face = U
Down, or bottom face = D
Left face = L
Right face = R
Front face = F
Back face = B
We can turn each face either clockwise or counter-clockwise, with respect to the center (i.e. a move that may be clockwise to you, when looking at the cube, may not be clockwise for that face, in relation to the middle of the cube). The names for the different kind of moves (I'll use the U face as an example) are:
A 90-degree turn clockwise on a face, is denoted by U.
A 90-degree turn counter-clockwise on a face is denoted by U' ("U prime") (Also note this is the same as U, done three times).
A 180-degree turn either clockwise or counter-clockwise on a face, is denoted by U2 ("U squared") and is the same as two clockwise turns, or two counter-clockwise turns.
We can refer to individual pieces by a two-letter (for edges) or three-letter (for corners) combination. For example, the piece in the upper right front corner is called URF, and the edge piece to the down and left of the cube is called DL. Also, these notations refer to the piece that is in that place at that time, not the piece that should go there.
Also, note that during any sequence of moves the position of the center pieces with respect to one another is unchanged.
Step 1 -- Do the first face
I was thinking of omitting this step; if you've come so far as to seek help for doing the Rubik's cube, then you've probably been able to do one side. But I've included the details in for completeness.
The first step involves choosing a color, and getting all the pieces of that color to form a complete face. These must also be in the correct relative location.
First, we will do the edges. Let's say we pick white as the side to complete first (many people choose white as it is the easiest color to pick out). Turn the cube so that the white center piece is on the U face. Note that the centers are attached, so that they are always in the same position with respect to one another, unlike a cube of even degree (i.e. 2 x 2 x 2 or 4 x 4 x 4).
First, we put the edge pieces (those with 2 colors) in the right place. There are several possibilities. Note that when moving pieces around you should have the piece that you are working on the F face.
White/Other color (OC) piece is on the D face. Rotate the D face so that it is directly underneath the place where it needs to go (on the U face). If the white side of the piece is on the D face, apply F2, and it will be correct. If the white side of the piece is not on the D face, apply D R F' R'.
White/OC piece is on the center slice (i.e. middle portion of the cube) . Apply F or F' to get the piece on the D face, and then perform above moves.
White/OC piece is in correct position, but incorrectly rotated. Apply F2 and do the above moves as necessary.
Second, we do the corners. There are six main possibilities for each of the four corner pieces:
Corner piece in correct place. Do nothing.
Corner piece is in the correct place, but incorrectly rotated, so that the piece needs rotating clockwise. Hold the cube so that this piece is in the URF location, and apply F D F' D' F D F'.
Corner piece is in the correct place, but incorrectly rotated, so that the piece needs rotating counter-clockwise. Hold the cube so that this piece is in the URF location, and apply R' D' R D R' D' R.
Corner piece on D face. Rotate D face so that the corner piece you want to move into position is directly underneath its intended location. If the corner piece has white (or whatever color you chose) on the bottom, and the destination of the piece is URF (i.e. the upper right hand corner on the front of the cube), apply R' D2 R D R' D' R.
Corner piece on D face, and white side of the corner is on the left hand side, assuming that the piece is going to the URF location. Apply F D F'.
Corner piece on D face, and white side of the corner is on the right hand side, assuming that the piece is going to the URF location. Apply R' D' R.
You should be finished the white face by now. This step is fairly intuitive, so it shouldn't have been too much of a problem.
Step 2 -- Do the middle layer edge pieces
Okay, so the U face is done...Now we have to get the edge pieces of the middle layer in place, that is the FR, FL, BR, BL pieces.
There are four possibilities:
Edge piece is in the correct place and oriented correctly -- do nothing.
Edge piece is in correct place, but oriented incorrectly. In this case, you have to replace it with another piece temporarily. Choose an edge piece that is on the D face, and move it to the position of the aforementioned edge piece using the move described in the following list item.
Edge piece is in an incorrect place in the middle layer. In most cases, you can just skip this edge piece for now, as it will move to the D face when you put the correct edge piece in that place. If you have two edge pieces in the middle layer that are in each other's correct places, then you will need to break the cycle by replacing one of those edge pieces with one of the D face edge pieces.
Edge piece is on the D face. This is good. Let's say you want to move the yellow-red edge piece into place on the middle layer. (Your cube may not have yellow and red as adjacent pieces, so you may have to substitute different colors). Check which side of the yellow-red piece is actually on the D face. Say yellow is on the D face. Rotate the D face so that the yellow-red piece is opposite from the yellow center. (If the yellow center is on the F face, then the yellow-red piece is the DB piece, got it?). Now, hold the cube so that white is the U face, and the yellow center is on the F face. Which side of the yellow-red piece is the red face on? If the red center is on the L face, then apply F' D' F D L D L'. If the red center is on the R face, then apply F D F' D' R' D' R. One way to think about this move, if you're trying to memorize it, is that you are removing the corner piece on the U side right above the edge piece you're trying to replace, and then putting it back in from the other direction, with the side effect of moving the edge piece into the correct place.
This will have to be repeated at least 4 times in order to get all of the 4 middle layer edge pieces into place.
Step 3 -- Form cross on last layer
The first two layers should now be completely correct. From now on, turn the cube upside-down, so that the first face (white, in my example) is the D face. It will remain this way until the cube is complete. The reason for this is just to make the manipulations a bit easier to perform.
On my cube, green is opposite to white, so I will refer to the green face as being the new U face for our purposes. We must now try to form a green cross, out of the green center, and the four edge pieces that surround it.
There are 4 possibilities:
All four pieces are correct, and you have green cross on the U face. Do nothing.
Two adjacent edge pieces are correct. For example, the UF and UR piece have green on the top, forming a sort of L shape, with the center. The UL and UB pieces do not have green on the top. In this situation, hold the cube so that the UF and UR pieces have green on the top (as in the example earlier in this paragraph), and apply B U L U' L' B'.
Two opposite edge pieces are correct, and the other two aren't. Let's say UR and UL are correct (this should make a green line down the middle of the U face). Apply B L U L' U' B'.
No edge pieces have green on the top. Hold the cube any way (still keeping the green center on the top) and apply B L U L' U' B' F U R U' R' F' (for those of you who want to memorize the moves, you should realize that this is the same as doing the move in the third part of this section, then rotating the cube 180 degrees, and then applying the move in the second part of this section).
You should now have the bottom two layers all correct, as before, and a green cross (or whatever the color on your cube whose center is opposite to white is) on the top face.
IMPORTANT: If the bottom two faces are perfectly correct, and you have 1 or 3 edge pieces that show green on the top, then your cube is messed up. Somebody (maybe you!) took it apart (or changed the stickers around) at some point in time. Might as well take it all apart right now, reassemble it correctly and start again.
Step 4 -- Rotate U face edge pieces
You now have a green cross on the U face, but...these edge pieces may not be in the correct order. This step involves rotating them so that the can be lined up with their respective colors.
If all 4 pieces are correct (the entire cube is correct except for four corner pieces on the top layer), then do nothing.
If 1 piece is correct, then rotate the whole cube so that this piece is in the UL position (make sure green is still on the top). If the remaining 3 edge pieces need to be rotated clockwise, apply R2 D' U2 R' L F2 R L' D R2. If the pieces need to be rotated counter-clockwise, apply R2 D' R' L F2 R L' U2 D R2.
If 2 "adjacent" edge pieces (by "adjacent" here I mean pairs such as UF and UL, or UB and UL, and not UF and UB, or UR and UL), then rotate the U face so that only 1 edge piece is correct, and follow that rule.
If 2 opposite (i.e. not adjacent!) edge pieces are correct, then apply U or U' and follow the rule for 0 edge pieces correct.
If 0 edge pieces are correct, turn the U face so that: for the UF piece (which can be any piece), the F side of that piece is the same color as the R face center. Now apply R2 D2 B2 D L2 F2 L2 F2 L2 F2 D' B2 D2 R2.
The four U face edge pieces should now be in the correct place. The cube should be all correct now except for the four corner pieces on the U face.
Step 5 -- Position U face corner pieces
Now we must move the corner pieces into the right places.
There are 3 possibilities:
All 4 corner pieces are in the right place, although not necessarily rotated correctly. Do nothing.
1 corner piece is in the right place. Hold the cube so that it is in the UFR position. If the remaining three corner pieces need to be rotated clockwise, apply L' U R U' L U R' U'. If they need to be rotated counter-clockwise, apply U R U' L' U R' U' L.
0 corner pieces are in the right place. If they all need to go to opposite corners, apply R' B2 F R F' R' F R F' R' F R F' R' B2 R. If they need to go to adjacent corners, hold the cube so that UFR and UFL pieces need swapping, and so do the UBR and UBL pieces. Apply B L U L' U' L U L' U' L U L' U' B'.
Okay, now all of the corner pieces should be in the right place. We're almost there!
Step 6 -- Rotate corner pieces
Hold the cube so that an incorrectly rotated corner piece is in the UFR position. If it needs to be rotated clockwise, apply F D F' D' F D F' D'. If it needs to be rotated counter-clockwise, apply D F D' F' D F D' F'. Now (and this is extremely important) turn the U face only, so that the next incorrectly rotated corner piece is in the UFR position. Apply one of the above moves, depending on which way it needs rotating. Repeat if more than two corner pieces are incorrectly rotated. After all pieces are rotated, simply turn the U face and complete the cube.
This step may be confusing, simply because after just one corner piece is rotated the cube is in quite serious disarray. Just make certain that you move only the U face and it should work out fine. I'll give one example to show exactly what will happen, for a simple example: the UFR piece needs rotating clockwise, and the UBR piece needs rotating counter-clockwise. Do these moves and the cube will be complete F D F' D' F D F' D' U D F D' F' D F D' F' U'.
Note that there are only certain combinations of incorrectly rotated pieces. If your cube gets to a position where there is a situation other than one of these, then it has probably been taken apart by small green aliens, so I would recommend disassembling it and starting over.
One piece needs rotating clockwise, one piece needs rotating counter-clockwise, other two are correct.
Three pieces all need rotating clockwise, other one is correct.
Three pieces all need rotating counter-clockwise, other one is correct.
Two pieces need rotating clockwise, two pieces need rotating counter-clockwise.
I was going to write "all corner pieces are correct" here, but I guess that would be obvious.
Solution #2
Background for Solution #2
If you are not familiar with the standard notation, please check Step 0 -- Notation from Solution #1. The following solution is a much easier to memorize way of solving the cube. Most of the moves are easy to understand, such that you don't even feel that you are memorizing anything. I will try to explain what to think when you are solving the cube. This section is new as of early December 1997, so I would really appreciate any feedback on this section in particular.
Step 1 -- U face edge pieces
So your cube is scrambled right now. The first thing to do is to chose a color, say white (it tends to stand out from the other colors on the cube). It's also a very good idea to always to a specific color first, since you will begin to learn which colors are adjacent, which speeds up things considerably.
The first step is to form a cross on the top face of the cube. Orient the cube so that the white center piece is on top. You want to get the correct pieces in the UL, UB, UR and UF locations. So, you will need to done some of the following moves: (be sure to do those in the first step first.
If a white-other color (OC) piece is on the U face:
If white is in the U position, simply rotate the U face until the OC is lined up with its center.
If OC is in the U position, rotate the U face so that the piece is at an adjacent edge location to its desired location. Hold your cube so that white is the U center and OC is the F center. Now rotate U so that the white-OC piece is in the UR position. Now apply R' F'.
If a white-OC piece is in the middle slice of the cube (the middle third), then hold the cube so that white is still on the U face, but this white-OC piece is in the FR location. Now, you should notice that you will be able to move it to the U face by applying F' (if the white face on the R side) or R (if the white face is on the F side). Find the spot where that white-OC piece should go. Rotate U until you can apply either F' or R to move the white-OC piece in the correct spot, so that the white face will move to the top. Examples: You want to move the piece in FR, with white being the R face, to its home location at UL, so apply U' F' U. You want to move FR, with white being the F face, to its home location at UL, so apply U2 R U2. See how you simply move U, then bring the edge piece up to the U face, then move U back to restore the original position, plus the piece you just moved.
If a white-OC piece is on the bottom slice of the cube:
If the white is on the D face, simply rotate D until the OC is directly underneath its center, and apply F2 (assuming the piece is at the FD position) to put it in the correct location.
If the OC is on the D face, hold the cube so white is the U center, and OC is the F center. Rotate D so that the white-OC piece is in the RD position, and apply R F' R' (you do not need R' if the UR piece had not been placed correctly yet).
You should now have a white cross formed on the top of your cube. Also you should be developing an intuition about these moves. What you will learn to do after a few times through this, is just think how the edge pieces are located relative to one another. This should speed things up.
Step 2 -- U face corner pieces
The second step is to correctly position three of the U face corner pieces. The reason that you will only put three of them and not four into place is that this method uses a "working space" which greatly simplifies the later steps.
There are three basic possibilities for putting corner pieces into place:
The piece is on the D slice, with the white side not on the D side. In this case, rotate the D face so that it is directly underneath the location that it should go to. Now, hold the cube so that the piece is in the DRF spot, and the intended location is the UFR spot.
If white is on the R side of the corner piece in DRF, apply R' D' R.
If white is on the F side of the corner piece in DRF, apply F D F'.
The corner piece is on the D slice, but the white face is on the D side. Rotate the D face so that the corner piece is in the DRF spot, and the intended location is the URF spot. Now apply R' D2 R D R' D' R. Note that you are doing R' D2 R to move the white side off the bottom of the cube, so that you can use one of the moves in the previous section. Also note that equivalent to this is: F D2 F' D' F D F'. I would imagine if you are left-handed this would make things easier. Speaking of which, if you are left-handed, I would be interested if you naturally use a particular one of these processes. Personally I am right-handed and do the "R' D2 R..." move, without really thinking about it.
The corner piece in question is in the right spot but incorrectly rotated. Therefore, we must rotate it. Hold the cube so that it is in the URF location. Now,
If the white side is on the R face, apply R' D' R D R' D' R.
If the white side is on the F face, apply F D F' D' F D F'.
So now you should be done one side, except for one corner piece. This location will be used to swap corner pieces in and out, greatly simplifying later processes. The moves in the first two steps are really quite intuitive. After only a few repetitions, you should find them simple and natural to do.
Step 3 -- Middle edge pieces
This step involves correctly placing three of the four edge pieces on the "middle" layer of the cube. For these moves you will need to hold your cube so that the white face is on the bottom. The only middle layer edge piece that you do not position is the one right above the corner piece that you did not position correctly in step 2.
First of all, make sure the white side is on the bottom, and the "empty" (i.e. incorrect) corner piece on the white side is in the DRF location. The middle layer edge pieces will all be positioned in this step, except for the FR one.
To move a piece into position, rotate the cube about its vertical axis, so that the intended location is the FR location. (For example, you want to put the FL piece in place. Rotate the cube a quarter turn counter-clockwise). Now rotate the bottom slice so that the incorrect corner piece is in the DRF location. (So in the previous example -- for the FL piece -- you would first turn the cube, then apply D').
Now you are ready to do the move. The move to put the new edge piece into place can only be done if it is on the U slice. If it is, note which side is NOT on the U face. You will need to apply either F' or R, depending on the orientation of the edge piece you want to move. Then, apply U until the piece you want to move is in the UF or UR (depending on your previous move) location, and then F or R', to get it back to normal. I'd better give an example... Yellow is the F center. Orange is the R center. You wish to position the Yellow-Orange edge piece, to the FR position. You have already rotated the D face so that the DRF location does not contain a white corner piece. You see the Yellow-Orange piece in the UB location. You note that Orange is the U side, and Yellow is the B side. Thus, you apply F' U2 F. All that description for three easy moves :-).
To continue, simply keep rotating D or D' and moving the cube to set up the same position, with an "empty" corner in DRF, the intended location at RF, and the piece you want to move in the U slice. Note that in some cases the piece may already be in the correct location, but orientated incorrectly. In this case you will have to take it out first (i.e. put any edge piece with the color whose center is opposite white on your cube into that location) and then put it back in that spot. In other words, with the DRF corner "empty" and the offending piece in the FR spot, apply F' U' F U R U' R'.
Now you should be done 2/3 of the cube, less two pieces: a middle layer edge piece and its adjacent corner piece, that appears to take a chunk out of the bottom (white) layer. Note that it is possible for the "empty" corner piece on the bottom layer to get solved by accident. If so, just ignore it, and pretend that it is unsolved.
Step 4 -- Solve remaining edge pieces
This is the only step that requires any actual memorization. I think you'll find that the moves from the other steps become very natural after a short time. There are two basic parts to this step, as follows. The goal of the whole step is to solve all of the 5 remaining edge pieces. The first part is to solve three of these (UF, UL, UB), and the second part is to solve the other two together.
First of all, hold the cube so that the "empty" edge piece is in the BR position, and thus the "empty" corner piece is in the RDB position. To do moves in this part, you first of all move a piece into the BR location, then move it to the U face, to one of those UF, UL, or UB positions. The move is as follows. First, optionally rotate U. Then, apply R' or B. Then rotate U the desired amount. Then do R or B' (to undo the first part of this move). Pretty simple huh?! An example may be in order. Let's say the Blue-Yellow piece is in the BR location. Furthermore, Blue is the U color, and Yellow is the L color. You would thus apply U [to put the UL location (the destination) in the right spot] B U' B'. However, when actually trying to solve the cube quickly, before applying U' in the previous move, you should look to find the next edge piece that you wish to put in the right location. So rotate U until it is in the UB location, and then by applying B' you return the cube to a stable position. Then, you will need to rotate U some amount to get the UL piece (Blue-Yellow in the example) back to the right place. There is a tremendous amount of freedom in this sequence of moves. In fact, you do not need to return the edge pieces to the correct spots in between repetitions of this move. Simply realize how the pieces go with respect to one another, and then finally align them, when all three (UF, UL, UB) are done.
Now, there are four possibilities. The remaining edge pieces are the BR piece and the UR piece. Do the following:
Luckily, the pieces are correct. Move to the next step and smile at your good fortune.
The pieces are in the correct locations, but incorrectly oriented. Apply B U' B' U R' U R U'.
Both edge pieces (BR and UR) have the same color on the R side of the piece, which is the same color as the R center. Apply U' R' U' R U' R' U' R U'.
The other case (the UR piece has the R color on its U side, and B color on its R side, and the BR piece has the U color on its R side, and the R color on its B side). Apply B U B' U B U B' U2.
If you want to reduce memorization at the expense of some speed, two of these moves suffice. In other words, if you apply all three of these moves in any sequence to an all-edges correct cube, you will get back an all-edges correct cube.
Step 5 -- Position corner pieces
In this step you want to move the remaining unsolved corner pieces to their correct locations, irrespective of orientation. Hold the cube so that the "empty" corner piece on the bottom (white) face is in the DRB location. Rotate the U face so that the piece that you want to position is in the UFL location. Apply L D2 L'. Now, rotate the U face so that the location (with respect to the top-layer edge pieces) of the corner piece you are working on is in the UFL location. Now apply L D2 L' again. Rotate U so that everything lines up. Repeat this (up to 3 times) until all of the corner pieces are in the right location.
This step is a little confusing at first. First of all, make sure your DRB piece is that "empty" (unsolved...not missing :-) ) corner piece. Say the UFL piece is Blue-Yellow-Orange. But that piece should go in the URB location. You would do the following moves: L D2 L' [move the piece in question out of the way (to the DRB location, if you're interested)] U' [move the correct location to the UFL spot] L D2 L' [move the piece question back to the U slice] U [undo the U twist you did earlier]. One thing to note when doing this move, make sure the original UFL piece does not contain the color of the bottom face (white in my ongoing example). Also note that you are free to rotate the U face before the move so that you can move a particular corner piece that you want to position into the UFL location so that you can work with it. The only (slight) difference will be that you will need to rotate U at the end to make up for that. Note that these U-rotations should be very obvious. You can simply line up the top-layer edge pieces with their respective centers.
The remaining paragraphs in this section are optional, and a bit more advanced and lengthy, so you may want to skip over them if this is your first time through. If you want to add a bit of speed to this solution and perhaps save some work during Step 6, read on. There are two ways of optimizing this step. First, you can position two of the corner pieces at once (instead of one, as I describe above), and second, you can often rotate some of the pieces appropriately while you are positioning them.
If you consider a plane of symmetry running through the four corners (yes, only three are actually needed) UFL, UBR, DFL, DBR, you will notice that L D2 L' (the move I introduced at the start of this section) and F' D2 F are mirror images. This means it's possible to do either one (the same move must be done twice, you can't mix and match) in order to complete this section. If you know how the pieces are going to rotate, then you can take advantage of this in order to do some orienting of the pieces while you position them.
I usually approach this section by first looking at the DBR piece. This allows you to position two pieces at once, since you don't just choose an arbitrary corner on the U face, you specifically rotate U so that when you start the move, you will send the DBR piece to the proper location. There are three possibilities for how it is rotated.
If the U color is on the R face of the DBR piece, then doing the F' D2 F move will correctly rotate it. So in this case, you would first of all position the U face so that the UFL position was where the DBR piece should go, then do F' D2 F, then rotate U so to piece you just moved out of the UFL position will get moved into the correct place, and then do F' D2 F again.
If the U color is on the B face of the DBR piece, then doing the L D2 L' move will correctly rotate it. Follow the same procedure as for the previous condition.
If the U color is on the D face of the DBR piece, then you can't correctly rotate it with one of the moves. However, you can still correctly position two corner pieces, if the place that you are sending the DBR piece to is not occupied by a corner piece containing white, the D color.
If the DRB piece is already in the correct place, you can often save a rotation by choosing to correctly position a U face corner piece that has the U color on its U face. Both the F' D2 F move or L D2 L' move will rotate it correctly.
Step 6 -- Orient corner pieces correctly
Corner pieces must be rotated in pairs -- one clockwise and one counter-clockwise. Find two incorrectly rotated corner pieces that are on the same slice. Hold the cube so that one of the pieces in the UFL position and the other is somewhere on the U slice.
To rotate a piece clockwise, apply L D2 L' F' D2 F.
To rotate a piece counter-clockwise, apply F' D2 F L D2 L'.
Note that after orienting the first corner piece, apply U until the other corner piece goes in the UFL location. You will then need to turn U to undo the previous twisting (this should be fairly obvious). Here's an explicit example -- the UFL piece needs rotating counter-clockwise, and the UFR piece needs rotating clockwise. The full sequence would be as follows: F' D2 F L D2 L' [orient UFL piece] U [position other corner] L D2 L' F' D2 F [orient original UFR piece] U' [undoes rotation of U that was done earlier].
You may need to apply this pattern up to 3 times. Note that you can only do one clockwise and one counter-clockwise twist. You cannot twist three corner pieces all clockwise, like the corner-twisting move in Solution #1. If the two remaining corner pieces are diametrically opposed (e.g. at UFL and DRB), then you can apply R2 (in this case) to bring both of them onto the U slice. Then, do the sequence. The apply R2 again to get to the original configuration.
SEEMS REALLY EASY...NOT.
Strider - Bwaaaaaaa!!! Okay, a few thoughts.
1. Your delivery of an epic-Strider-comment was long overdue!
2. TLM is either a liar or a genius.
And since you didn't return my calls this weekend (you're right little bro - Strider's never around when we call!), fyi Prison Break is new tonight. Have a safe and enjoyable guilt trip. ;)
strider- Wow. Now that was impressive!
sar- I'm neither of those things, actually :) And while I think we'd all get a kick out of watching you use your brother's method, consider this one.
TLM - Your link was really cool. And while I'm glad to know you're not a liar, you still give me too much credit! :)
Strider, I used to have all of that stored in my head, but now that I've gotten older I find I'm suffering from CRS.
God Bless America, God Save The Republic
isnt it amazing the kind of junk we decide to lean and the usefull stuff that we choose to ignore?
i think i could recite a lot of pulp fiction still but i used to be able to go pretty much word for word.
sorry...
Post a Comment
<< Home